Tuesday, October 29, 2013

Bannock: How to make the survival bread of the north


Some simple flour recipes can be invaluable when bad stuff happens, you have hungry people to feed, and there aren't a lot of ingredients available.
by Leon Pantenburg

It only took the addition of some other grains to make this basic bannock survival ration into a tasty, nutritious food. (Pantenburg photo)[/caption]
Bannock is the traditional bread of Canada and the Northwest. Native people had no access to wheat flour prior to the arrival of European traders, although some flour substitutes existed, like wild turnips or corn, dried and ground to a powder.
Bannock actually originated in Scotland. Because bannock could be quickly prepared from readily-available ingredients, and because these ingredients lasted a long time without spoiling, bannock became a staple of European fur traders and subsequently, the native people also.
But the original recipe is nothing but flour and water, and traditional bannock is essentially frontier junk food.
Here's how to add a few ingredients to make flour-based survival foods more nutritious.
Start by amending the flour. Basic, white, bleached all-purpose flour has virtually all the nutrients taken out of it in processing. To each cup of white flour, add one tablespoon of soy flour, a tablespoon of dried milk and a teaspoon of wheat germ. According to "Classic Sourdoughs: A Home Baker's Handbook" by Ed Wood, such an amendment combines enzymes and creates a complete protein, similar to meat.
I've used this amendment for years, and you can't taste the difference in the baked goods. Try amending the flour in all your survival recipes that use white flour, such as hardtack, and you'll feel the difference. Here is the traditional bannock recipe:
food insurance adBannock Recipe
1 c flour
4 tsp double-acting baking powder
2 Tbs powdered skim milk
Stir ingredients together; stir in water to make dough moist. Knead dough until smooth. Place in greased cast iron skillet or Dutch oven over the campfire or on coals and bake about five to 10 minutes until the top is brown. Then turn the bread and brown the other side.
A handy way to prepare for a backpacking or hiking trip is to mix all the dry ingredients in a Ziplock bag. Just add 1/2 cup of water and knead in the bag. Then take out the dough, finish kneading and spread it in the pan.
(Practice baking the bannock by the campfire. Put the dough in a greased skillet, and place it near the campfire, propped at about a 60-degree angle with a stick. When the side nearest the fire browns, flip the bread and brown the other side. In a pinch you could bake it on a plank!)
SurvivalCommonSense Bannock Recipe
1/8 tsp salt
1 Tbs soy flour
1 tsp buckwheat flour
1 Tbs flax meal
2 Tbs stone ground whole wheat flour
4 tsp double-acting baking powder
Pace all the above ingredients in a one cup measure and add enough unbleached bread flour to make one cup of dry ingredients in volume. Add 2 Tbs powdered skim milk, and stir until thoroughly mixed.
Add enough moisture to make a moist dough, and knead until smooth. Place in a greased cast iron skillet and bake. If you're making this inside, bake at 425 degrees for about 20 minutes.
Except for the different ingredients, you can treat the improved recipe just like the traditional. Put the improved bannock mixture in a ziplock bag to make later on the trail, and you can cook it just like the traditional recipe.
With either recipe, bannock is a quick, easy way to make use of wheat flour. Both recipes are good survival tools that could prove to be really useful in your survival kit!
Here's an easy, simple recipe for grilling chicken.
(Here's a way to add some poetry and fun to your next campout: Mix up one of the above recipes and get it started cooking over the fire. Then whip out this Robert Service poem and read aloud: While the Bannock Bakes.)
Comments? Check out our Facebook page!

Thursday, October 10, 2013

Quick Pantry Chili

The cooler weather makes me want to cook more substantial meals.  Preferably meals that can last a couple of days during the busy week.  This recipe is for a stick-to-your-ribs chili using a lot of canned goods from the pantry. Feel free to use fresh vegetables from your garden, if you have them.

Quick Pantry Chili ala Karla
1-2# ground beef   (I use 2#. DH wants a meaty chili)
1 large onion - finely chopped
1 clove of garlic – minced
 In an 8 quart stock pot:  brown the ground beef with the onions and garlic until cooked through. Drain the fat.
Add:
1 can fire roasted tomatoes
1 can whole cooked tomatoes  (break up with a fork)
1 can pinto beans
1 can Chili beans (Bushs)
1 jar Salsa
1 can Tomato soup + 1 can water
1 pkg. McCormick Chili-O seasoning
Mix all ingredients together and simmer for half an hour or more.  Stir occasionally so it does not stick and burn.
Top with a dollop of sour cream and some chopped green onion.  I like crushed Fritos instead of crackers….;)

ie: canned goods are regular sized cans.


Thursday, June 28, 2012

Buckaroo Beans: a great beginner Dutch oven recipe

Anyone with storage supplies of dried beans needs innovative ways to cook them. Here is a favorite starter recipe from the Central Oregon Dutch Oven Society.
Freeze Dry Guy: food security for uncertain timesby Leon Pantenburg
People getting started in Dutch oven cooking are often somewhat intimidated when it comes to participating in a Dutch Oven Gathering or cookoff. One of the fool-proof recipes that is usually recommended to these folks is Buckaroo Beans. This recipe, from Amber Franks, and published in the Central Oregon Dutch Oven Cookbook, Volume One, makes use of several kinds of beans.
Dried or storage foods can easily be substituted for the fresh equivalents. Another nice aspect of this dish is that the beans can be cooked and simmered over a campfire in a Dutch oven.
Check out the recipe - you'll find yourself making it even when you don't need to prepare a meal under
survival circumstances!
Buckaroo Beans
1 lb ground beef
1 large onion, chopped
1/2 tsp garlic powder
1 tsp dry mustard
1/2 c ketchup
Visit our store!

2 tsp vinegar
1 tsp Worcestershire sauce
1 tsp each of oregano, basil and dill
2 (14 oz) cans of kidney beans
1 (6 oz) can baby lima beans
1 (24 oz) can Boston style baked beans
In a 12-inch Dutch oven, brown hamburger with the chopped onion. Add seasonings and beans (undrained except for the lima beans). Mix together and add ketchup, vinegar and Worcestershire sauce. Cook at about 325 degrees for about one hour.


Wednesday, June 20, 2012

A common question among new off grid and/or cast iron cooks is "How do I season cast iron?" Here is the barbecue grill method I use, and it works really well!
by Leon Pantenburg
Visit our store!

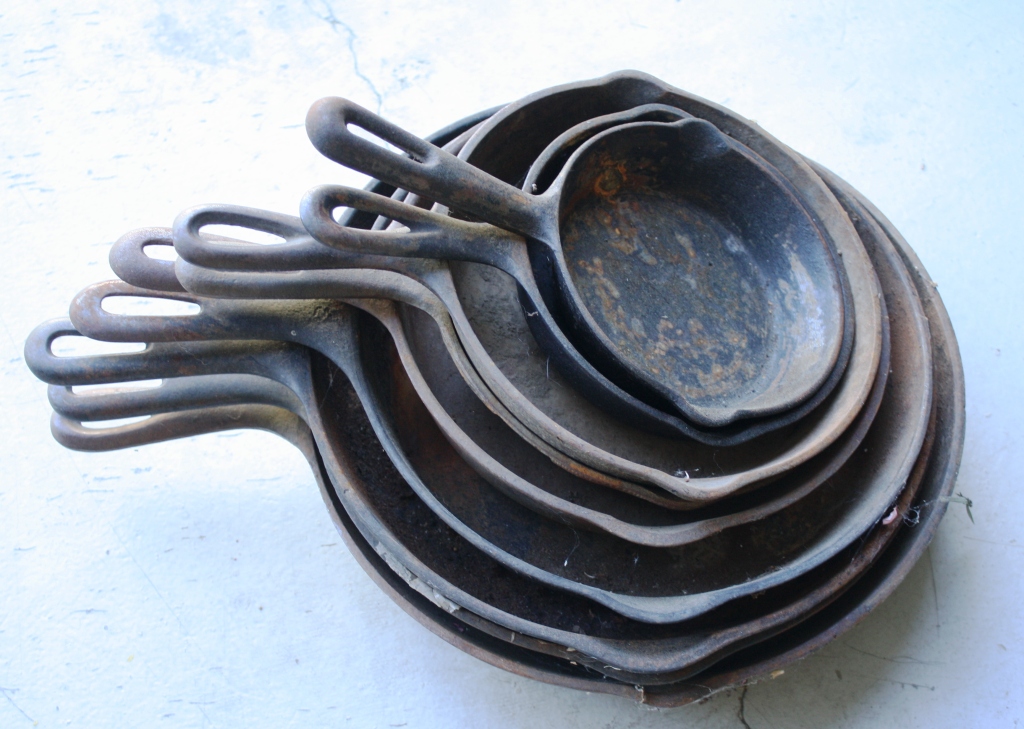
Cast iron cookware will last forever if you take care of it. But what happens if an implement is neglected and develops some rust? Or what about that crusty, dirty relic of an unsuccessful camping trip you find at a garage sale? At what point does it become unsalvageable?
This stack of garage sale cast iron skillets can be restored to usefulness with a little work.
These skillets can be restored to usefulness.

Here is a quick way to re-season any piece of cast iron. Essentially, all you're doing is removing all the rust and residue, wiping down all the surfaces with a cast iron conditioner, and baking the oven outside in a hooded barbecue grill.
I've been using this method for years to periodically re-season and touch up the cast iron that belongs to a local Boy Scout troop. All these camp ovens have been used for several years, sometimes under duress and severe conditions, and they still work to help provide a mouth-watering meal!
Obviously, the more abused and rusty the implement is, the more work will be involved to bring it back into service. In some instances, I've had to take a particularly cruddy piece to an auto body shop and have it sandblasted.
But all this effort is worth it when you end up with a good piece of cast iron that will last indefinitely.
For a more comprehensive look at seasoning cast iron, click on Restoring a Cast Iron Treasure.
Check out the video below!


Monday, April 30, 2012

Asparagus Bacon Chowder

Part of having a survival mindset is figuring out how to use what you have on-hand at right that moment.
Here in Iowa we've been experiencing some weird weather.  Hot when it's supposed to be cold, cold when it's supposed to be hot.  This past week we had a cold snap of 40ºF during the day...brrrrrr  I was in the mood for some nice warm soup and I didn't want to make a trip into the grocery store.  After scrounging through my pantry, this is the result.

Asparagus Bacon Chowder

1# Fresh Asparagus (out of our garden that day)
6-8 cups Water (enough to cover asparagus & rehydrated potatoes)
1 TBSP. Chicken base paste
6 green onions (again, out of the garden) could use dehydrated
1 cup Potato dices-dehydrated
1 tsp. Mrs. Dash-regular

1 can PET evaporated Milk
1 heaping TBSP. Bacon TVP bits-dehydrated

1 cup shredded white cheese. 
Pepper to taste
Salt to taste.  (sample before adding, there is salt in the Chicken base)

In a large sauce pan add the water, chicken base & dehydrated Potato.   Let sit for 10-15 minutes to reconstitute the potatoes.  Meanwhile, cut the asparagus into 2 inch pieces.  Dice up the onions. Add veggies to the saucepan,(may add more water to cover) then bring to a boil. Lower to a simmer and cook until the potatoes are done.  Add the spices, bacon, cheese and can of milk.  Gently heat through until the cheese melts.. Do NOT let the soup come back to a boil.  

Serve with a slice of homemade Sourdough bread.....

Friday, January 13, 2012

Survive the Flu Chicken Noodle Soup

uggghhh It's that time of year again..Flu Season. Yes, it got me! Yesterday I felt like death warmed over or, something a truck decided to squish. No way was I going to do any major cooking.. Luckily, I have a very well stocked pantry, so Pantry Chicken Noodle Soup came to the rescue. Yes, I know this isn't as good as the boil a chicken, make the broth & noodles type. But, in a pinch, it turned out down right tasty.

In a large 4 qt saucepan bring about 2 qts water to a boil.
To that add:
2 cubed potatoes
2 med carrots (peeled & diced)
1 stalk celery~diced (I used dried)
1 TBSP. Dried Onion
1/4 tsp. Dried Garlic
1 TBSP Dried Chives
Pepper to taste
(If you have dried veggies, this is a great way to use them)
Boil for about 5 minutes.
Then Add:
1/2 package of Kluski noodles or whatever type floats your boat!
1 (12.5 oz) pkg. Canned Chicken (Add broth and all)
1 (32 oz.) pkg Chicken broth (or broth base equivalent)
Simmer for another 5 minutes or so until the noodles are done.

You can just boil the veggies and noodles in the broth. But, I'm trying to cut down on salt and wanted more liquid in the soup. Therefore the added water in the beginning.

Sunday, November 20, 2011

Survival Recipe: Storage Food Rice Pudding

A great way to use up leftover rice.
One of the longest-lasting storage foods is rice. Properly packed  and stored, rice can safely be stored to last for 25 years without the taste being affected.
But no matter how much you like rice, a steady diet of any food  can lead to diet monotony.
This recipe, from “Jan’s Fabulous Food Storage Recipes,” by Jan LeBaron” lends some variety to a food storage staple, and is an easy way to use up some extra, leftover  rice! Click here to read the recipe.