It is great to have an ample supply of storage food for emergencies, but how will you cook these staples? Veteran off-grid and Dutch oven cook Karla Moore guides you through the tasty way to survive using simple recipes!
Normally I have been posting recipes using just canned, dried or storage goods. Sometimes it's best to think outside the box and use what you have on-hand. Try something different to keep your taste buds alive. This recipe starts out with a very basic Curry Sauce. It's delicious even without the avocado. The full recipe uses fresh ingredients. You add whatever is in your pantry. The veggies may be fresh or canned. Add meat if you have it. Served over steamed rice, it makes a very filling meal. I don't know any Preppers that don't have a supply of rice on-hand!
Avocado
Curry (ALA
Karla)
Curry
sauce:
1 small Avocado
14 oz. Coconut milk
½ cup Chicken broth or water
3 TBSP. Soy Sauce 2-3 TBSP. Green Curry Paste (3 is really spicy)
Combine curry ingredients in a 4 qt. heavy
saucepan. Use an immersion blender to
blend it smooth. You may also mix in a
regular blender. If sauce is too thick,
add more broth or water. Bring to a
boil, turn down to simmer while stir frying the other ingredients.
In a heavy skillet add a couple TBSP. of olive
oil. Add the chicken and onion stir
frying until it is just done. Using another ½ cup of broth deglaze the pan,
scraping up the flavor loaded fond. Add
this to the contents of the saucepan.
Add the veggies and pineapple to the curry sauce and
bring back to a simmer. Cook until
potatoes are done. Stir in the additional
avocado and fresh basil, cook until the basil wilts. Serve with hot steamed rice.
Beans are a staple of long term food storage, and for good reason. Beans are a great source of useable protein, contain no cholesterol and are rich in fiber. They are also a good source of Vitamins A and C, Thiamine, potassium and iron. So, you already know all that. The point is, how can you serve beans regularly, while still adding some variety? by Leon Pantenburg
This recipe comes from Jan LeBaron's cookbook: "Jan's Fabulous Food Storage Recipes: Converting Stored Foods Into Usable Meals." This pinto bean recipe is simple and easy to prepare in advance. Serve beans with rice and you get a complete protein. As Jan recommends in her cookbook, combine this recipe with cornbread or Sopapillas or tortillas.
"When times are hard, this is a good meal to have every week," she comments in the cookbook.
I might add, when times are good, pinto beans can be part of a great, quick meal when everybody has somewhere to go during the evening! Make the rice and re-fried beans in advance and refrigerate. Then, all you have to do is brown some hamburger with a packet of taco seasoning. Warm and combine all these ingredients with some shredded cheese and lettuce and roll in a flour tortilla, and you have one of my favorite fast meals! Combine these ingredients into a burrito and make a foil wrap, and put the packet in a re-sealable plastic bag for a quick meal on a dayhike or outing. At lunch or dinner time, make a campfire, and when the coals burn down, remove the foil wrap from the plastic bag and toss it on. Cook about five to ten minutes, then turn and cook another five to ten minutes. (Click here to learn how to make a foil wrap.)
Here's how to make the beans: Favorite Family Pinto Beans
2-1/4 c pinto beans
2 quarts water
2 Tbs oil (optional)
1 Tbs onion, powder
1/4 tsp black pepper
1/2 tsp cayenne pepper
2 tsp salt
Soak the beans either overnight, or in boiling water for about an hour. Drain and cover with two quarts of fresh water, then bring to a boil over medium high heat. Reduce the heat so the beans merely simmer. Cover and simmer for 30 minutes. Add the remaining ingredients. Cover and simmer for about an hour. The beans should be tender and fragrant. Bite into one to see if it's cooked through. When they are tender, they're ready to eat. To make re-fried beans: Scoop up as many juicy beans as you want to use and put them in a large skillet. Add a little fat, if desired. Heat the beans and their juice over a medium-high flame while mashing them with a fork or potato masher. Add more bean juice as needed to keep the mixture moist. When the beans are hot and mashed, with a few beans chunks, they are done. Serve with cheese as a dip or stuffed into tortillas.
I was really sad when my favorite "Double Dutch Chocolate" coffee mix was discontinued. So, always up for a challenge, I decided to try to make my own version. You should have most of these ingredients already in your pantry.
Mocha Coffee Mix
1 1/2 cups non-fat Dry Milk
1 3/4 cup Powdered Sugar
3/4 cup Powdered Creamer
1/2 cup baking Cocoa (I used Dutch Processed)
1/3 cup Instant Coffee (reg or decaf)
1/4 tsp. salt
2 rounded TBSP. Malt Powder
Sift ingredients together. Store in an air-tight container in a cool pantry.
Mix 3 rounded tablespoons mix into a mug with boiling water. Stir well.
It tastes better when sipped out of an Artisan mug...
Some simple flour recipes can be invaluable when bad stuff happens, you have hungry people to feed, and there aren't a lot of ingredients available. by Leon Pantenburg It only took the addition of some other grains to make this basic bannock survival ration into a tasty, nutritious food. (Pantenburg photo)[/caption] Bannock is the traditional bread of Canada and the Northwest. Native people had no access to wheat flour prior to the arrival of European traders, although some flour substitutes existed, like wild turnips or corn, dried and ground to a powder.
Bannock actually originated in Scotland. Because bannock could be quickly prepared from readily-available ingredients, and because these ingredients lasted a long time without spoiling, bannock became a staple of European fur traders and subsequently, the native people also.
But the original recipe is nothing but flour and water, and traditional bannock is essentially frontier junk food.
Here's how to add a few ingredients to make flour-based survival foods more nutritious.
Start by amending the flour. Basic, white, bleached all-purpose flour has virtually all the nutrients taken out of it in processing. To each cup of white flour, add one tablespoon of soy flour, a tablespoon of dried milk and a teaspoon of wheat germ. According to "Classic Sourdoughs: A Home Baker's Handbook" by Ed Wood, such an amendment combines enzymes and creates a complete protein, similar to meat.
I've used this amendment for years, and you can't taste the difference in the baked goods. Try amending the flour in all your survival recipes that use white flour, such as hardtack, and you'll feel the difference. Here is the traditional bannock recipe: Bannock Recipe
1 c flour
4 tsp double-acting baking powder
2 Tbs powdered skim milk
Stir ingredients together; stir in water to make dough moist. Knead dough until smooth. Place in greased cast iron skillet or Dutch oven over the campfire or on coals and bake about five to 10 minutes until the top is brown. Then turn the bread and brown the other side.
A handy way to prepare for a backpacking or hiking trip is to mix all the dry ingredients in a Ziplock bag. Just add 1/2 cup of water and knead in the bag. Then take out the dough, finish kneading and spread it in the pan. (Practice baking the bannock by the campfire. Put the dough in a greased skillet, and place it near the campfire, propped at about a 60-degree angle with a stick. When the side nearest the fire browns, flip the bread and brown the other side. In a pinch you could bake it on a plank!) SurvivalCommonSense Bannock Recipe
1/8 tsp salt
1 Tbs soy flour
1 tsp buckwheat flour
1 Tbs flax meal
2 Tbs stone ground whole wheat flour
4 tsp double-acting baking powder
Pace all the above ingredients in a one cup measure and add enough unbleached bread flour to make one cup of dry ingredients in volume. Add 2 Tbs powdered skim milk, and stir until thoroughly mixed.
Add enough moisture to make a moist dough, and knead until smooth. Place in a greased cast iron skillet and bake. If you're making this inside, bake at 425 degrees for about 20 minutes.
Except for the different ingredients, you can treat the improved recipe just like the traditional. Put the improved bannock mixture in a ziplock bag to make later on the trail, and you can cook it just like the traditional recipe.
With either recipe, bannock is a quick, easy way to make use of wheat flour. Both recipes are good survival tools that could prove to be really useful in your survival kit!
Here's an easy, simple recipe for grilling chicken.
(Here's a way to add some poetry and fun to your next campout: Mix up one of the above recipes and get it started cooking over the fire. Then whip out this Robert Service poem and read aloud: While the Bannock Bakes.) Comments? Check out our Facebook page!
The cooler weather makes me want to cook more substantial meals. Preferably meals that can last a couple of days during the busy week. This recipe is for a stick-to-your-ribs chili using a lot of canned goods from the pantry. Feel free to use fresh vegetables from your garden, if you have them.
Quick Pantry Chili ala Karla
1-2# ground
beef (I use 2#. DH wants a meaty chili)
1 large
onion - finely chopped
1 clove of
garlic – minced
In an 8 quart stock pot: brown the ground beef with the onions and
garlic until cooked through. Drain the fat.
Add:
1 can fire
roasted tomatoes
1 can whole
cooked tomatoes (break up with a fork)
1 can pinto
beans
1 can Chili
beans (Bushs)
1 jar Salsa
1 can Tomato
soup + 1 can water
1 pkg.
McCormick Chili-O seasoning
Mix all
ingredients together and simmer for half an hour or more. Stir occasionally so it does not stick and
burn.
Top with a
dollop of sour cream and some chopped green onion. I like crushed Fritos instead of crackers….;)
Anyone with storage supplies of dried beans needs innovative ways to cook them. Here is a favorite starter recipe from the Central Oregon Dutch Oven Society. by Leon Pantenburg
People getting started in Dutch oven cooking are often somewhat intimidated when it comes to participating in a Dutch Oven Gathering or cookoff. One of the fool-proof recipes that is usually recommended to these folks is Buckaroo Beans. This recipe, from Amber Franks, and published in the Central Oregon Dutch Oven Cookbook, Volume One, makes use of several kinds of beans.
Dried or storage foods can easily be substituted for the fresh equivalents. Another nice aspect of this dish is that the beans can be cooked and simmered over a campfire in a Dutch oven.
Check out the recipe - you'll find yourself making it even when you don't need to prepare a meal under
survival circumstances! Buckaroo Beans
1 lb ground beef
1 large onion, chopped
1/2 tsp garlic powder
1 tsp dry mustard
1/2 c ketchup
Visit our store!
2 tsp vinegar
1 tsp Worcestershire sauce
1 tsp each of oregano, basil and dill
2 (14 oz) cans of kidney beans
1 (6 oz) can baby lima beans
1 (24 oz) can Boston style baked beans
In a 12-inch Dutch oven, brown hamburger with the chopped onion. Add seasonings and beans (undrained except for the lima beans). Mix together and add ketchup, vinegar and Worcestershire sauce. Cook at about 325 degrees for about one hour.
Wednesday, June 20, 2012
A common question among new off grid and/or cast iron cooks is "How do I season cast iron?" Here is the barbecue grill method I use, and it works really well! by Leon Pantenburg
Visit our store!
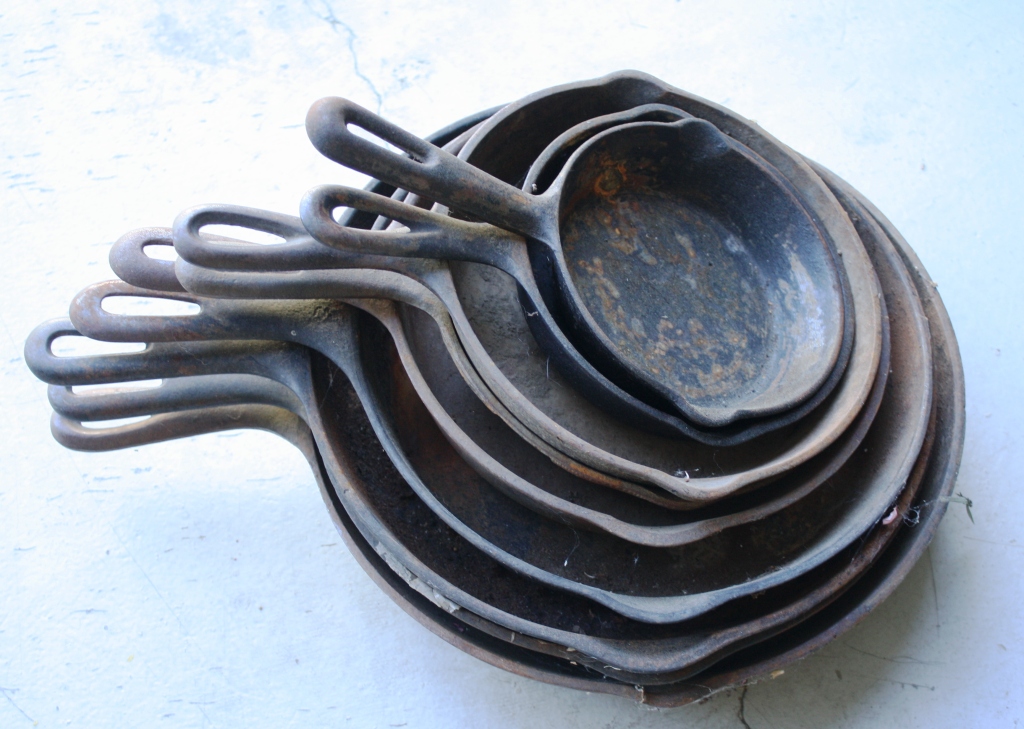
Cast iron cookware will last forever if you take care of it. But what happens if an implement is neglected and develops some rust? Or what about that crusty, dirty relic of an unsuccessful camping trip you find at a garage sale? At what point does it become unsalvageable?
These skillets can be restored to usefulness.
Here is a quick way to re-season any piece of cast iron. Essentially, all you're doing is removing all the rust and residue, wiping down all the surfaces with a cast iron conditioner, and baking the oven outside in a hooded barbecue grill.
I've been using this method for years to periodically re-season and touch up the cast iron that belongs to a local Boy Scout troop. All these camp ovens have been used for several years, sometimes under duress and severe conditions, and they still work to help provide a mouth-watering meal!
Obviously, the more abused and rusty the implement is, the more work will be involved to bring it back into service. In some instances, I've had to take a particularly cruddy piece to an auto body shop and have it sandblasted.
But all this effort is worth it when you end up with a good piece of cast iron that will last indefinitely.
For a more comprehensive look at seasoning cast iron, click on Restoring a Cast Iron Treasure.
Check out the video below!